Add a Printer & Installing Printer Driver
Network Printer Installation – Konica bizhub range.
If you already know the IP address for the printer skip to step 1 of Installing Printer Driver.
- On the MFP touchscreen, press the Home button indicated by the house shaped icon > Utility > Device Information > IPV4. Take note of the IPV4 address eg. 192.1.1.239
- Start Menu > Type and select [Control Panel] > Select [View Device and Printers] from the Hardware and Sound subsection.
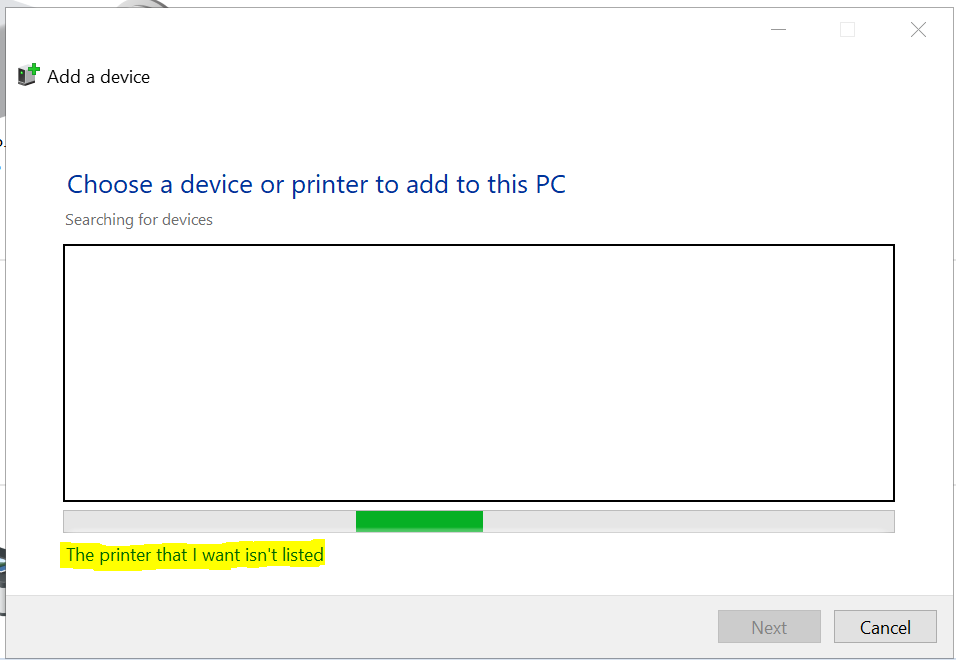
- Click [Add Printer] from the top bar, the following window will open.
Click the highlighted option below labelled [The printer that I want isn’t listed]
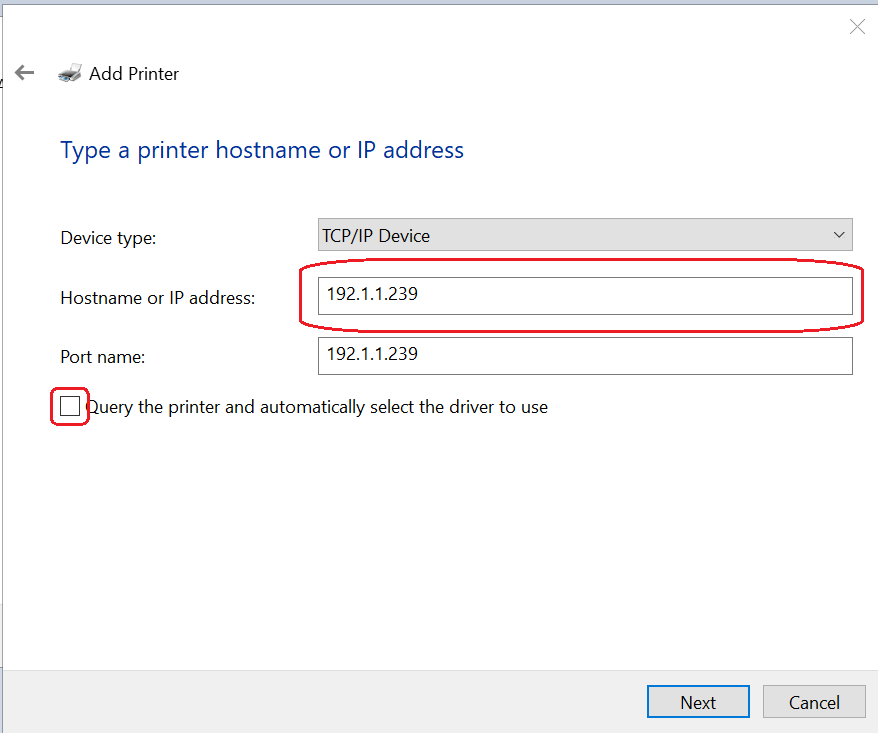
4. Click the option listed as ‘Add a printer using a TCP/IP address or hostname’ and click Next.
5. In the drop-down menu for Device type, select TCP/IP Device. Add the printer IP address in Hostname, this will automatically populate the Port name field. Make sure to UNTICK the box listed as [Query the Printer]
6. At this stage you will need to download the correct driver from the bluebox website using the link below.
https://www.bluebox.co.uk/driver-downloads/
7. Make sure to search for the driver that corresponds to your MFP brand and model number. For the following steps the driver example will be for the use of a Konica Minolta machine, however the installation steps will remain the same for all machines.
8. Type in the model number for your machine in the search for your product field as shown here.
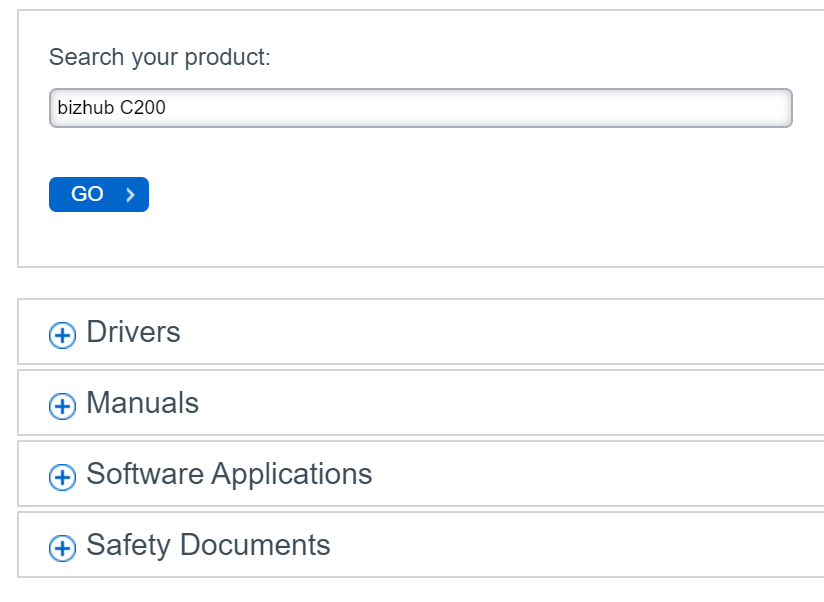
9. Click the Drivers option to expand the field and click download for the PCL6 or PostScript option
10. Check the box to [Accept License agreement] and select the file labelled as a [.Zip] extension.
11. After the file has been downloaded, locate the [.Zip] file in your Downloads folder, right click on the file and click [Extract All]. For ease, keep the extraction destination as the auto populated downloads folder and click [Extract].
12. From the Install Printer Driver window that asks you to select the driver as shown below, select [Have Disk] > [Browse] and locate the extracted file in the [Downloads] folder.
13. Click [Next].
14. Follow the instructions on the pages that follow. If the User Account Control window appears, click [Continue]. If the Windows Security window for verifying the publisher appears, click [Install this driver software anyway].
15. Click [Close].
16. After finishing the installation, make sure that the icon for the installed printer is displayed in the Printers window, located in the Device and Printers window from step 1.
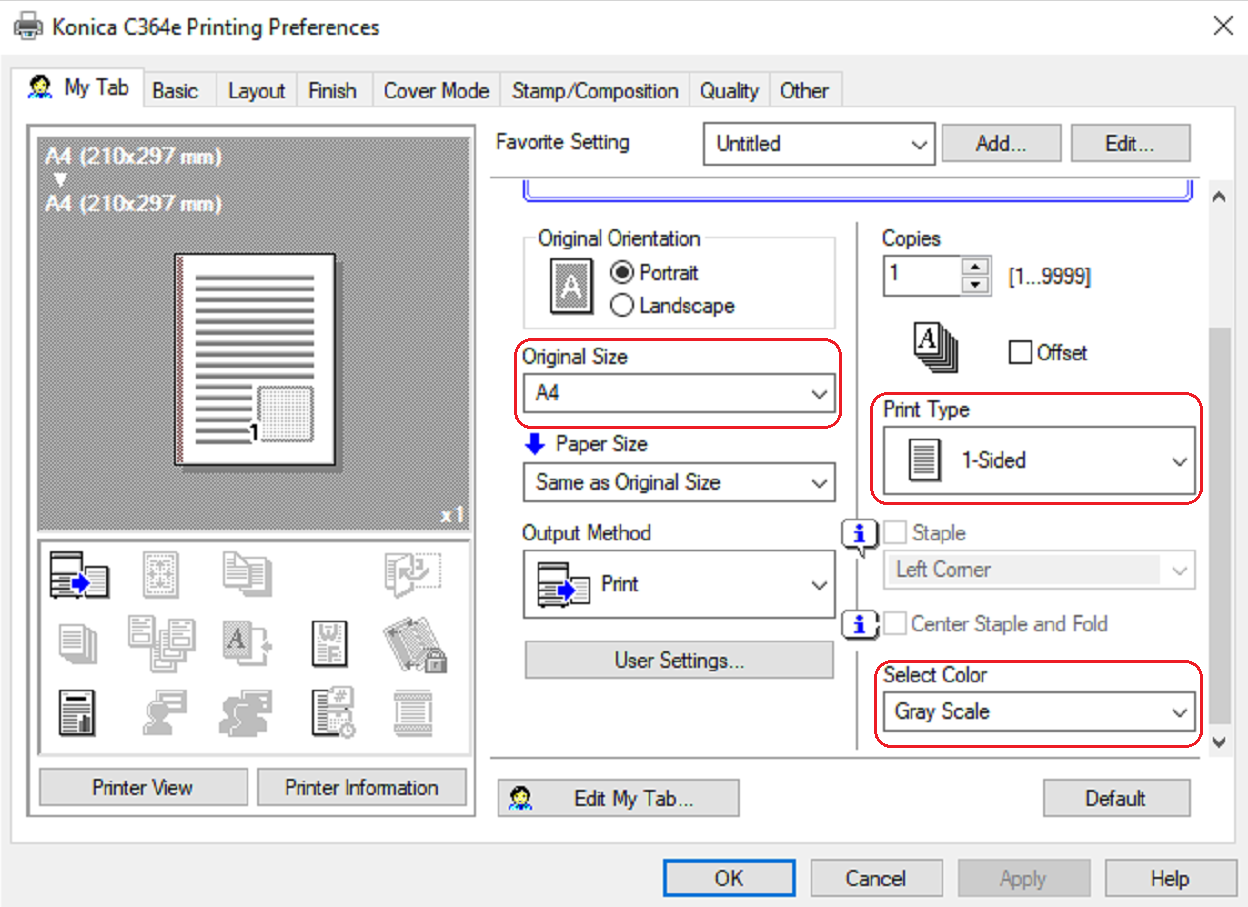
17. Right click the driver icon and select [Printer Preferences]. Here you can set the printers default printing setup. Choose the defaults you will be using for [Paper Size] e.g ‘A4’ > [Print Type] e.g ‘1-sided’ and [Select Colour] e.g ‘Auto Colour or Grey Scale’. When finished click [Apply] and [Ok].
Note: If you wish to make the printer you have installed your default, right click on the icon of the printer and select [Set as Default Printer].